Finished riveting sides of forward top skin, riveted and sealed firewall inset.
Time: 4 hours.

Finished riveting sides of forward top skin, riveted and sealed firewall inset.
Time: 4 hours.
Riveted forward top skin.
Time: 8 hours.
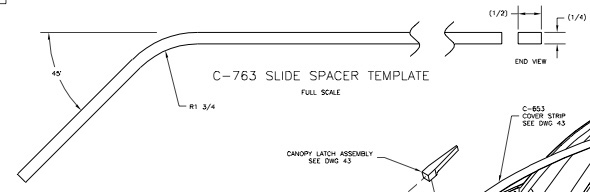
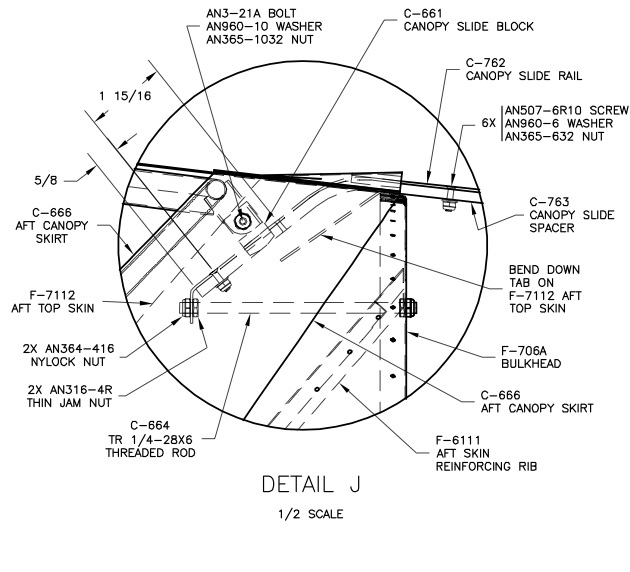
I checked the shape of the C-763 Slide Spacer against the full-scale template on DWG 41 as the part supplied in my kit varied slightly, so I carefully adjusted C-763 to match the template.
I completed the rear slider track assembly by positioning, drilling, and riveting the C-762 and C-763 parts together per DWG 43, Section H-H.
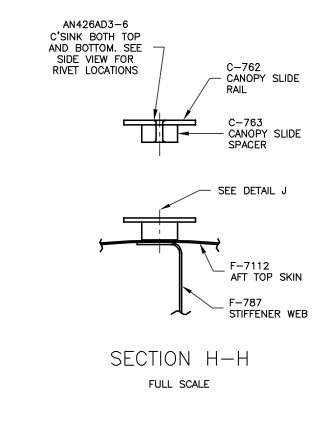
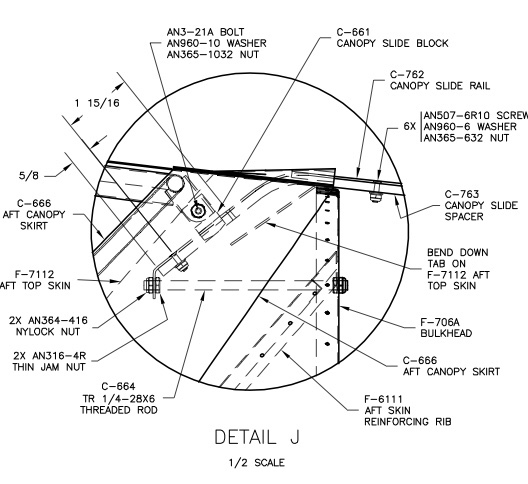
Make sure that you are not changing the shape of C-763 as you are attaching C-762 to it. Lay the track assembly in place approximately centered on the rear fuselage top skin. Bend the tab in the F-7112 skin down to allow the track assembly to rest on the skin. See DWG 43, Detail J.
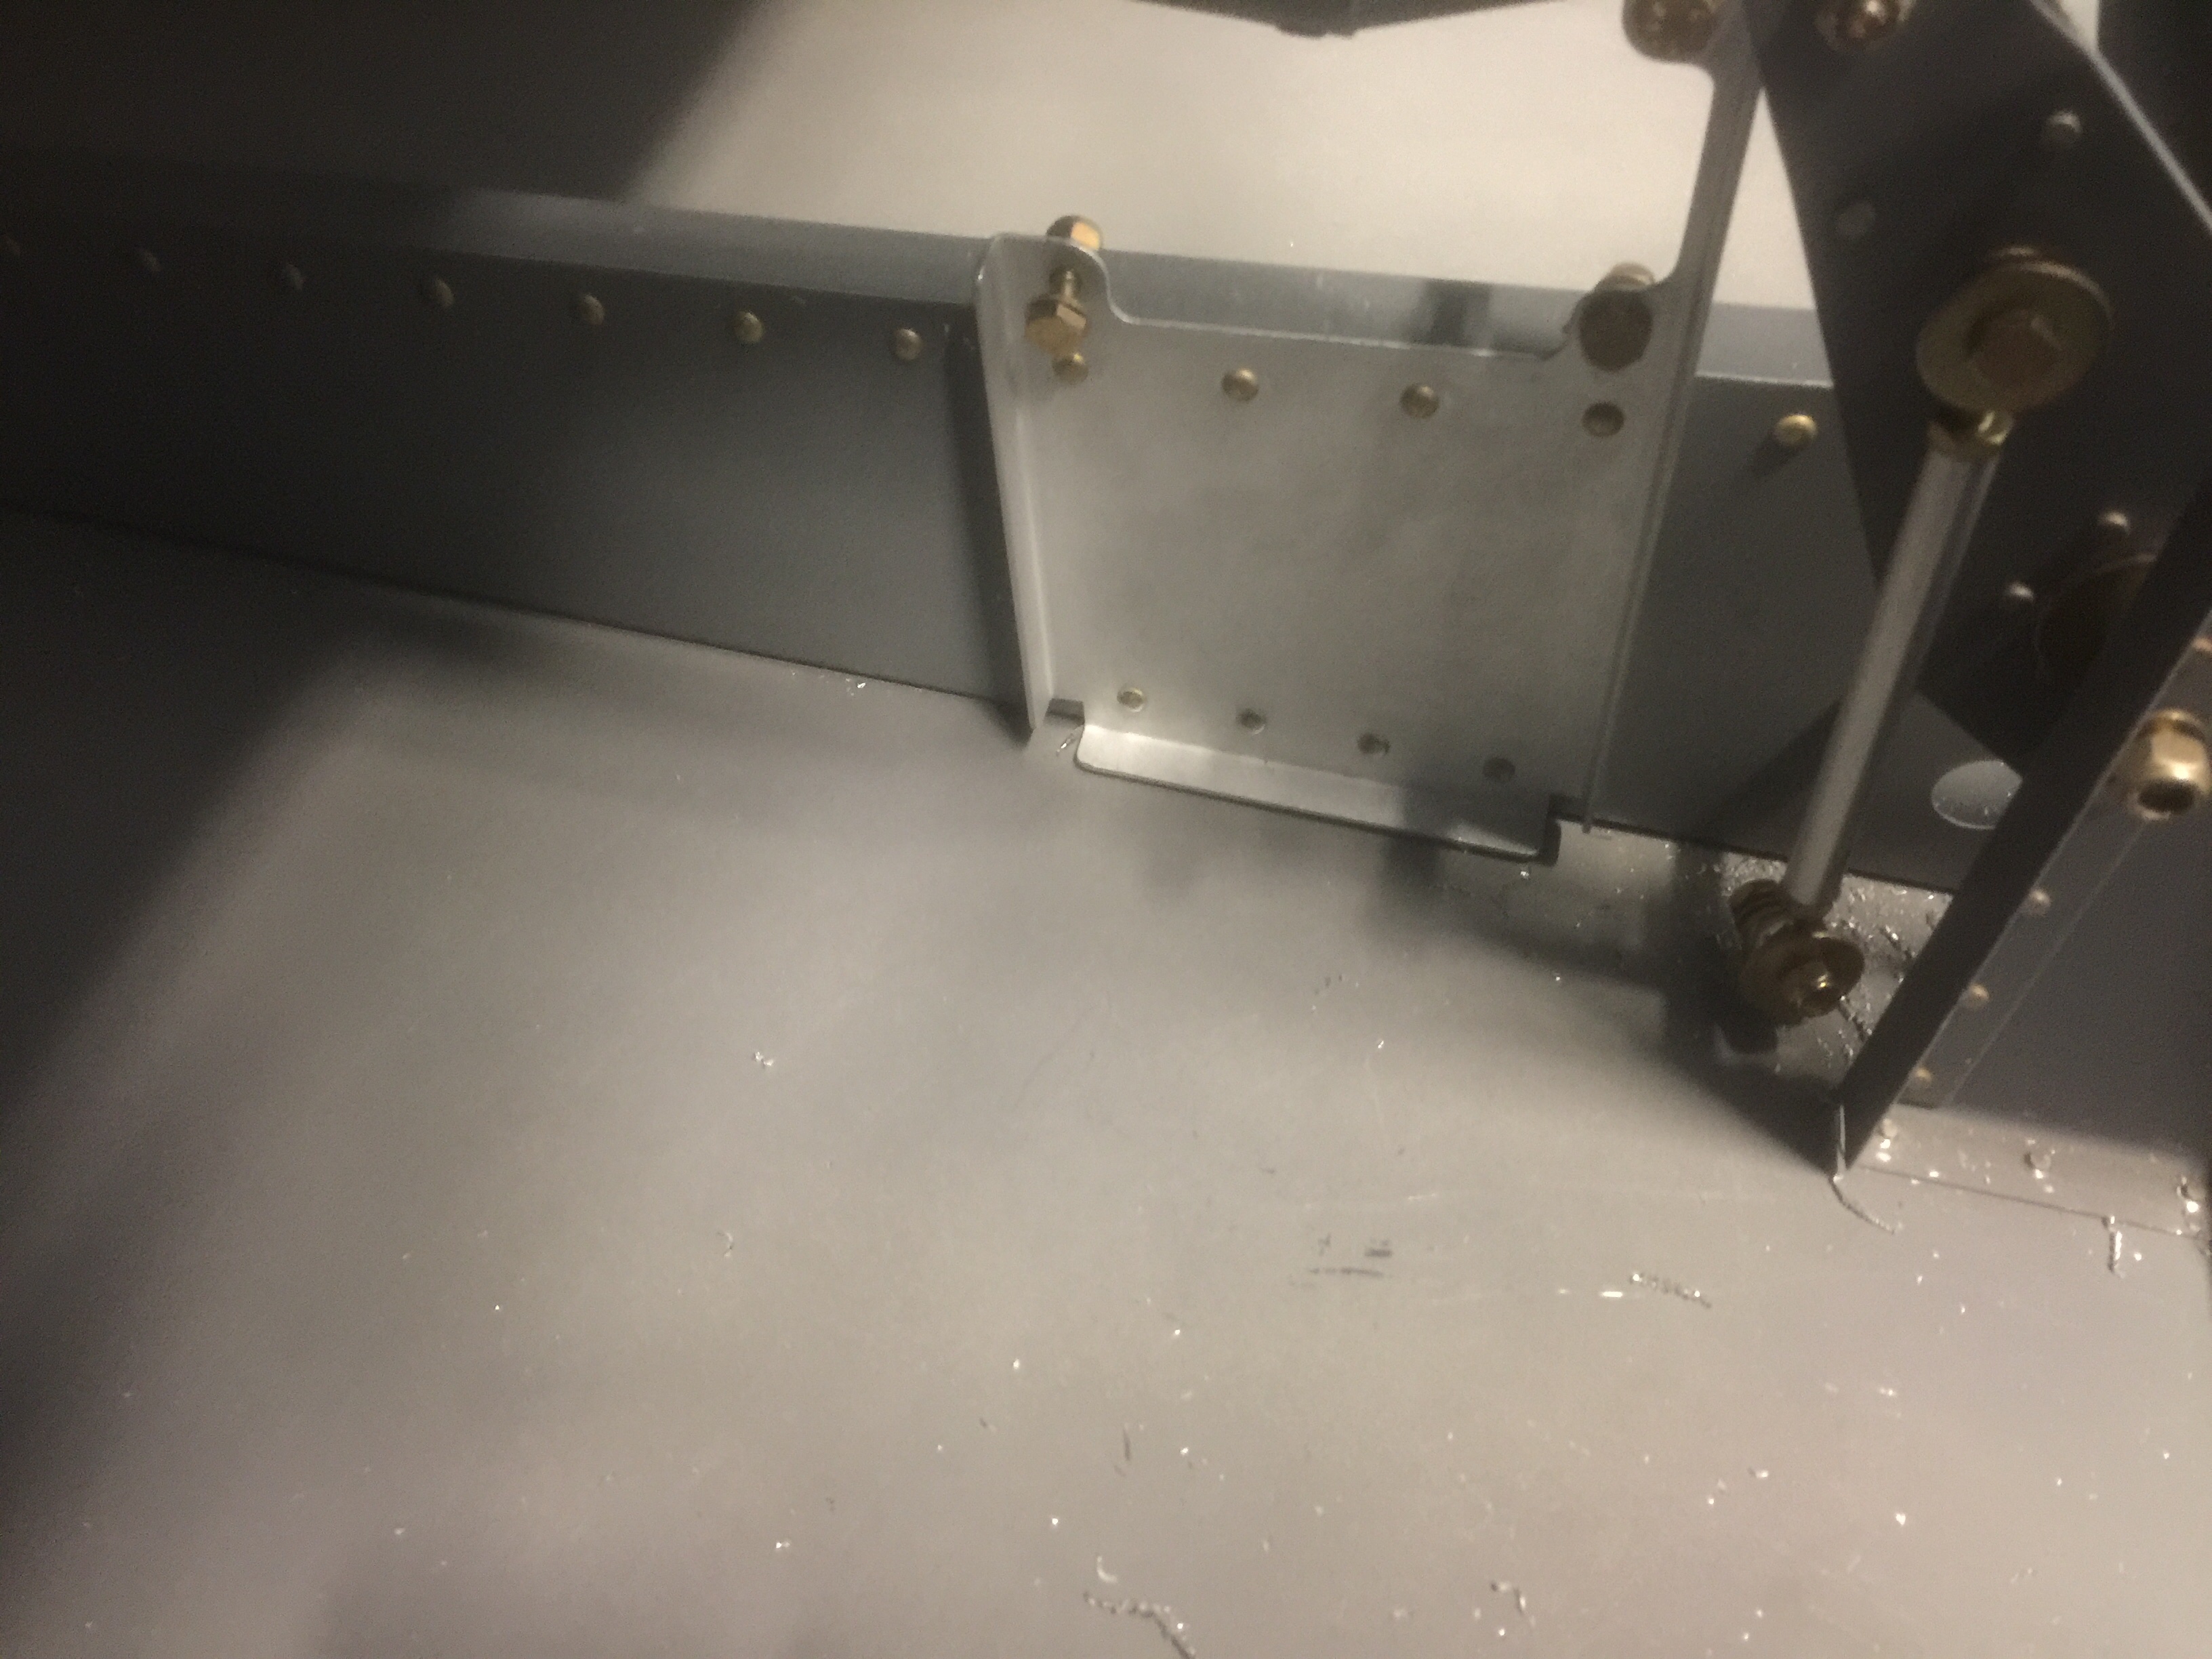
I then slid the C-661 block onto the track and held it in place on the fuselage with duct tape.
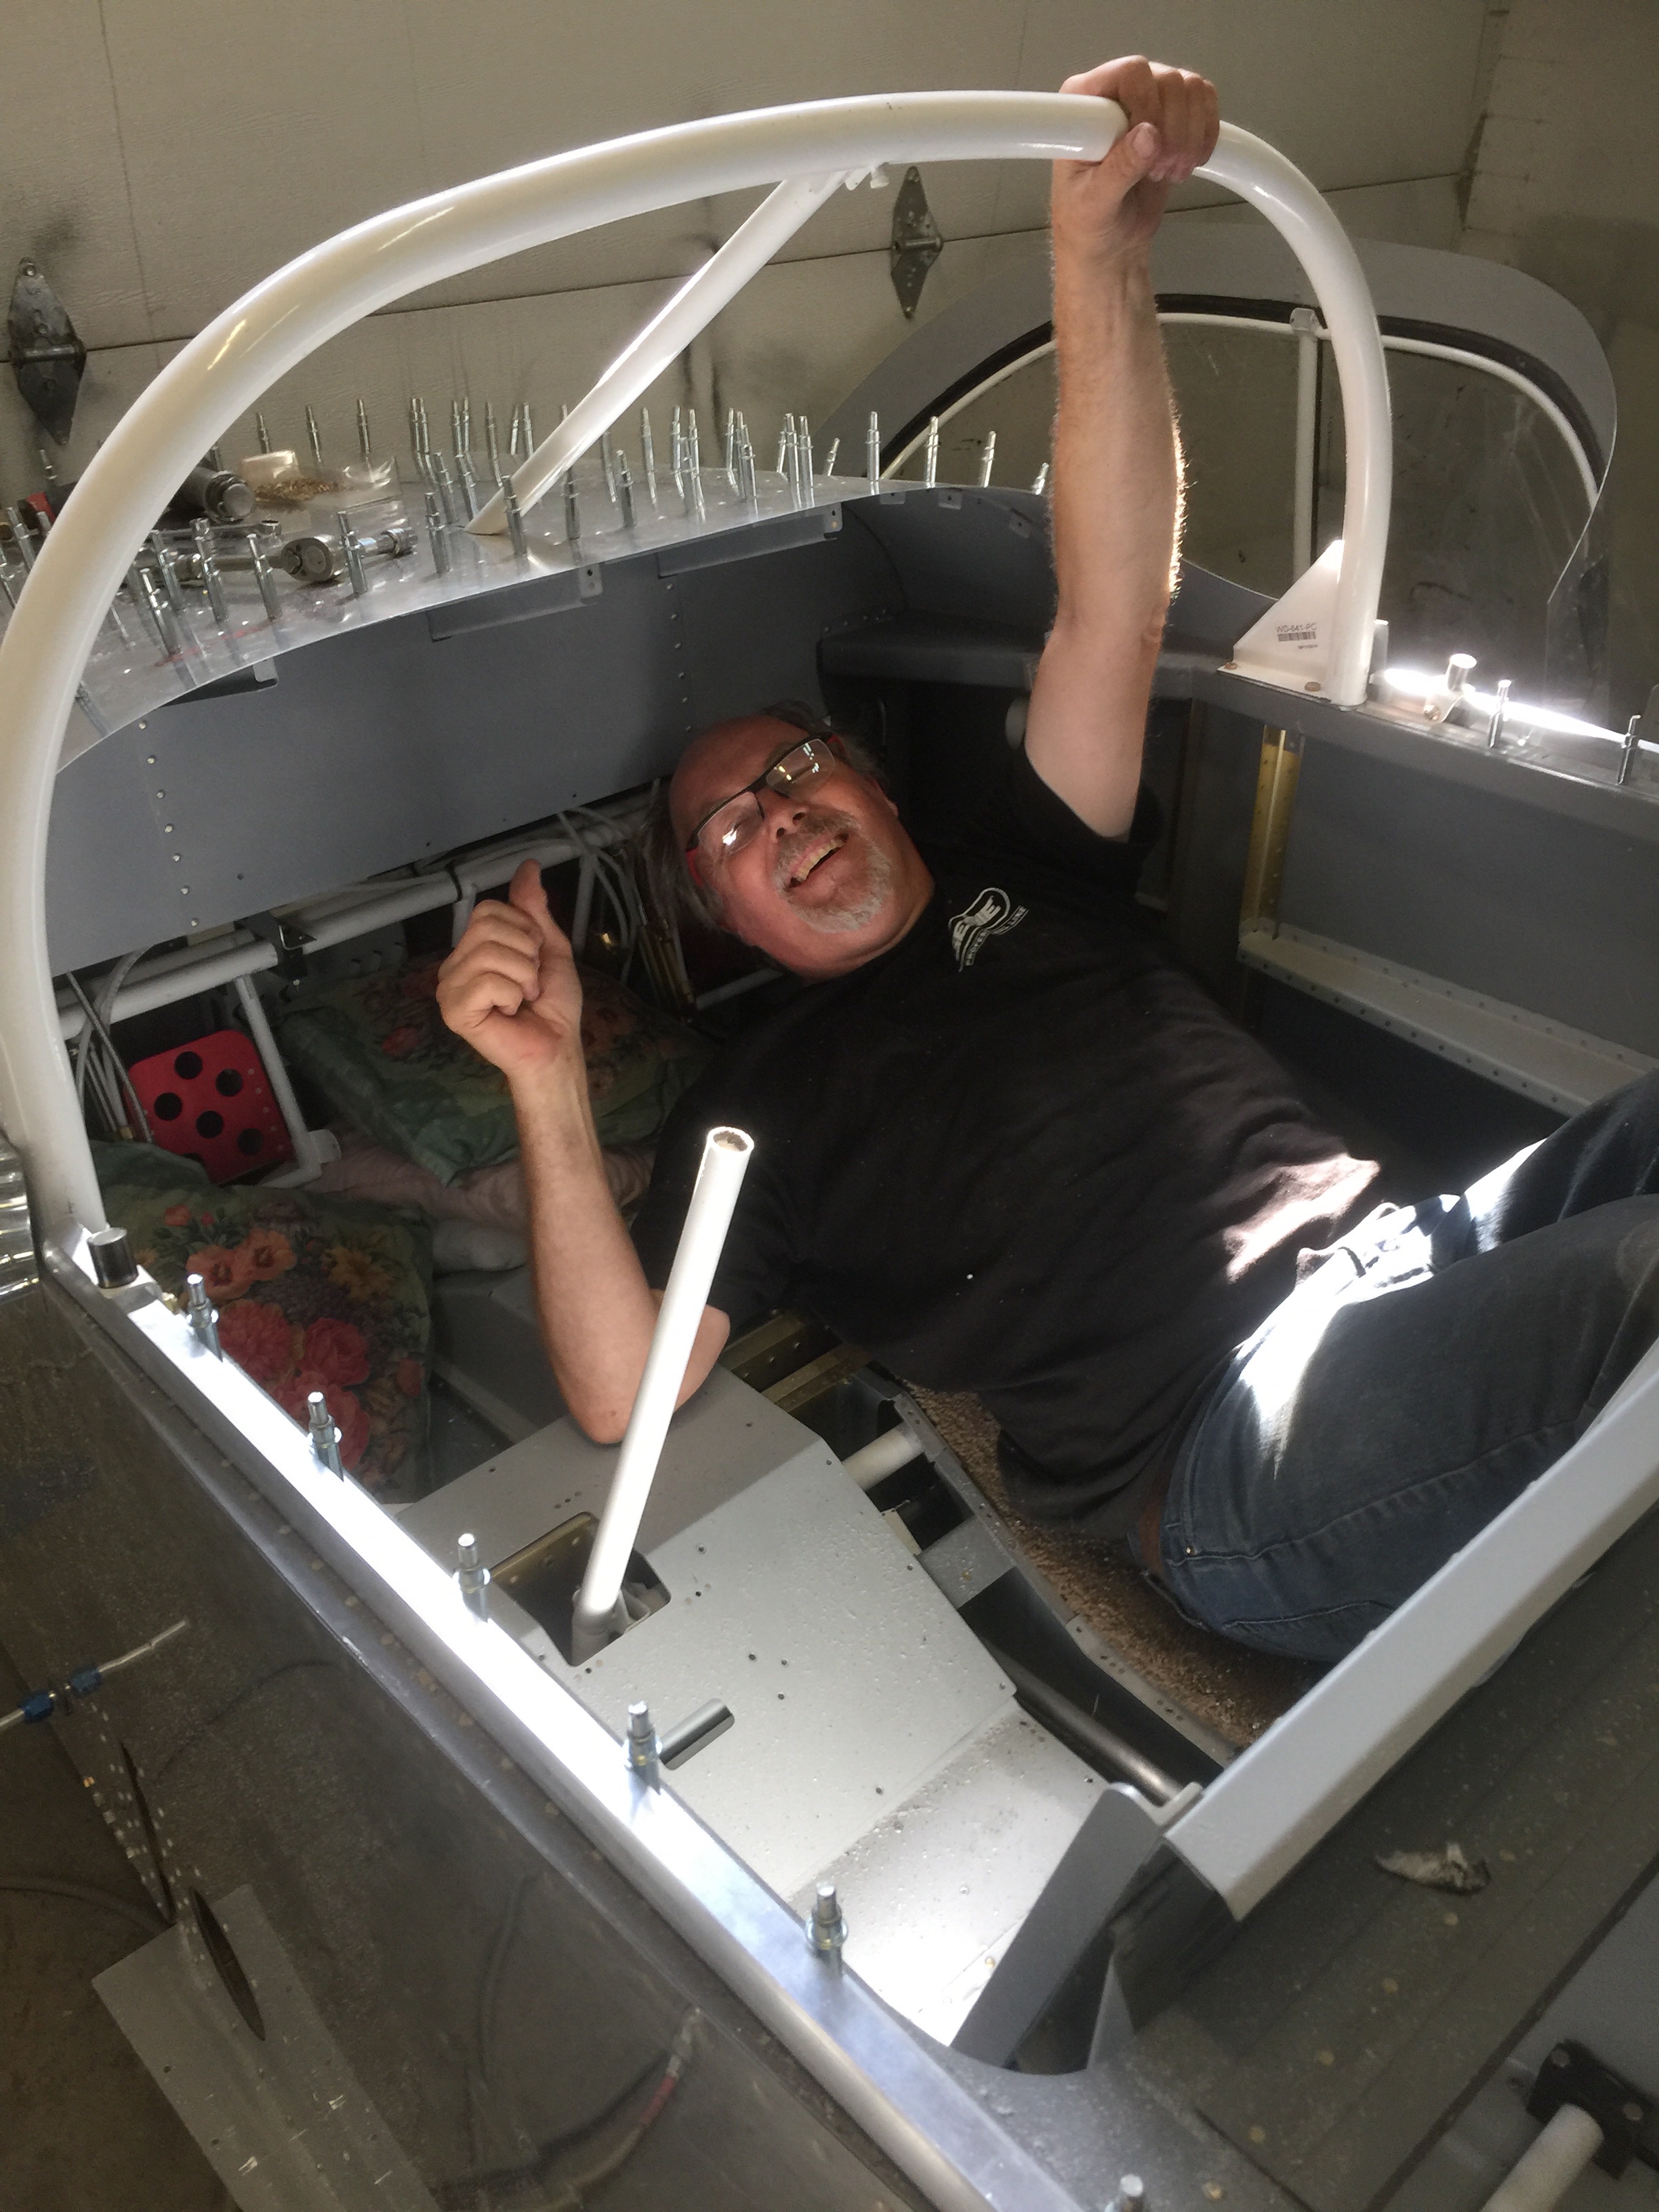
I installed the Wd-640 Canopy frame on the fuselage by inserting the rollers in the tracks through their open aft ends and inserting the bolt through the C-661. I slid the frame forward until it met the roll bar. The flanges of the Wd644 roller brackets were to be the first part of the frame assembly to touch the roll bar.
Time: 8 hours.
I assembled the Wd-644/C-658 roller assemblies (see DWG 41, Detail A) and inserted them into the tubes of the Wd640 Canopy Frame. Light clamping pressure with a small C-clamp held them in — I did not need to drill them to the frame until all canopy fitting adjustment had been made.
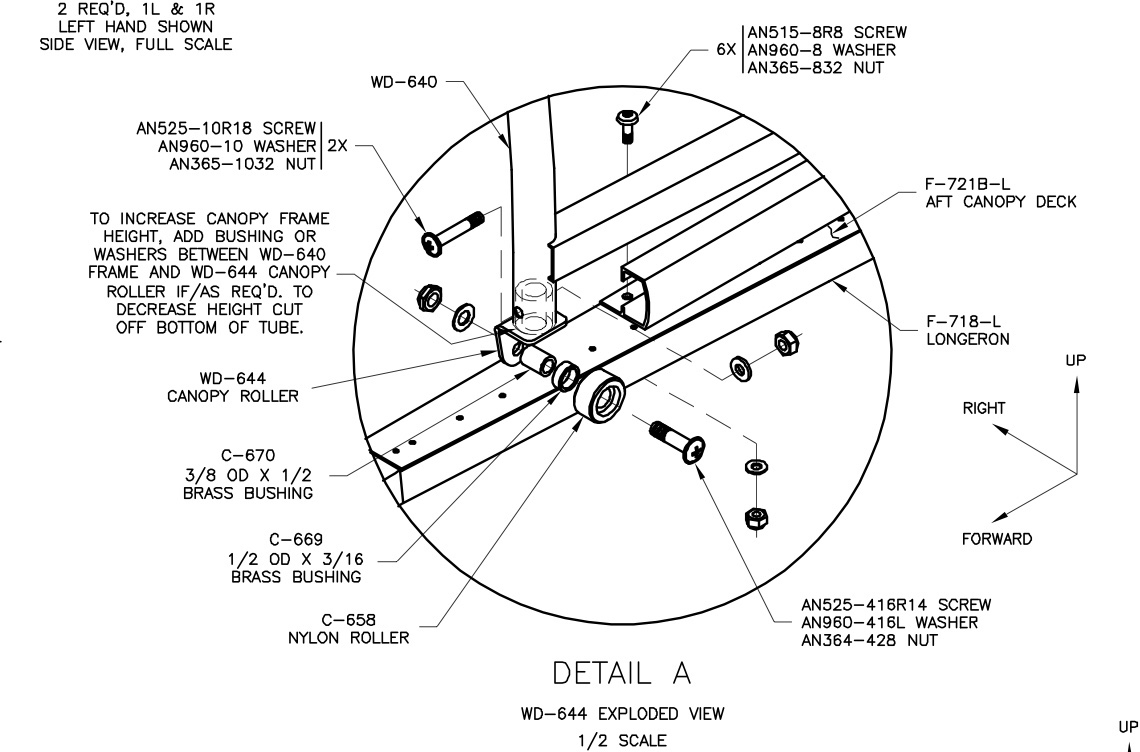
I cut the C-657 Canopy Tracks to length as shown on DWG 41.

I laid-out and pre-drilled the screw holes using a #40 bit using DWG 42, Sliding Canopy Top View for screw hole spacing. I then clamped the C-657 canopy tracks onto the F-721B Aft Canopy Decks.

I drilled the hole through C-661 per DWG 43, C-661 Detail View and then positioned the C-661 rear slider block under the receptacle on the rear center of the canopy frame weldment.

I drilled through C-661 and the canopy frame and inserted the bolt as shown in DWG 43, Detail J. Then I removed C-661 and de-burred the holes.
Time: 4 hours.
I removed the roll bar and drilled the holes up to final size in both the roll bar and in the aft canopy decks. The holes were #12 for the forward holes, ¼” for the aft holes. I used a unibit for the F-721B holes to keep the holes from wandering and then deburred all the holes.
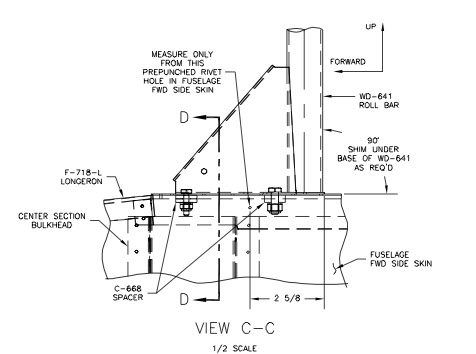
I installed bolts/nuts/washers to hold the roll bar in place for further fitting. When the nuts had been tightened, I double-checked that the roll bar was square to the fuselage longerons. See DWG 42, View C-C. I used shims as required particularly on the right side.
Time: 4 hours.
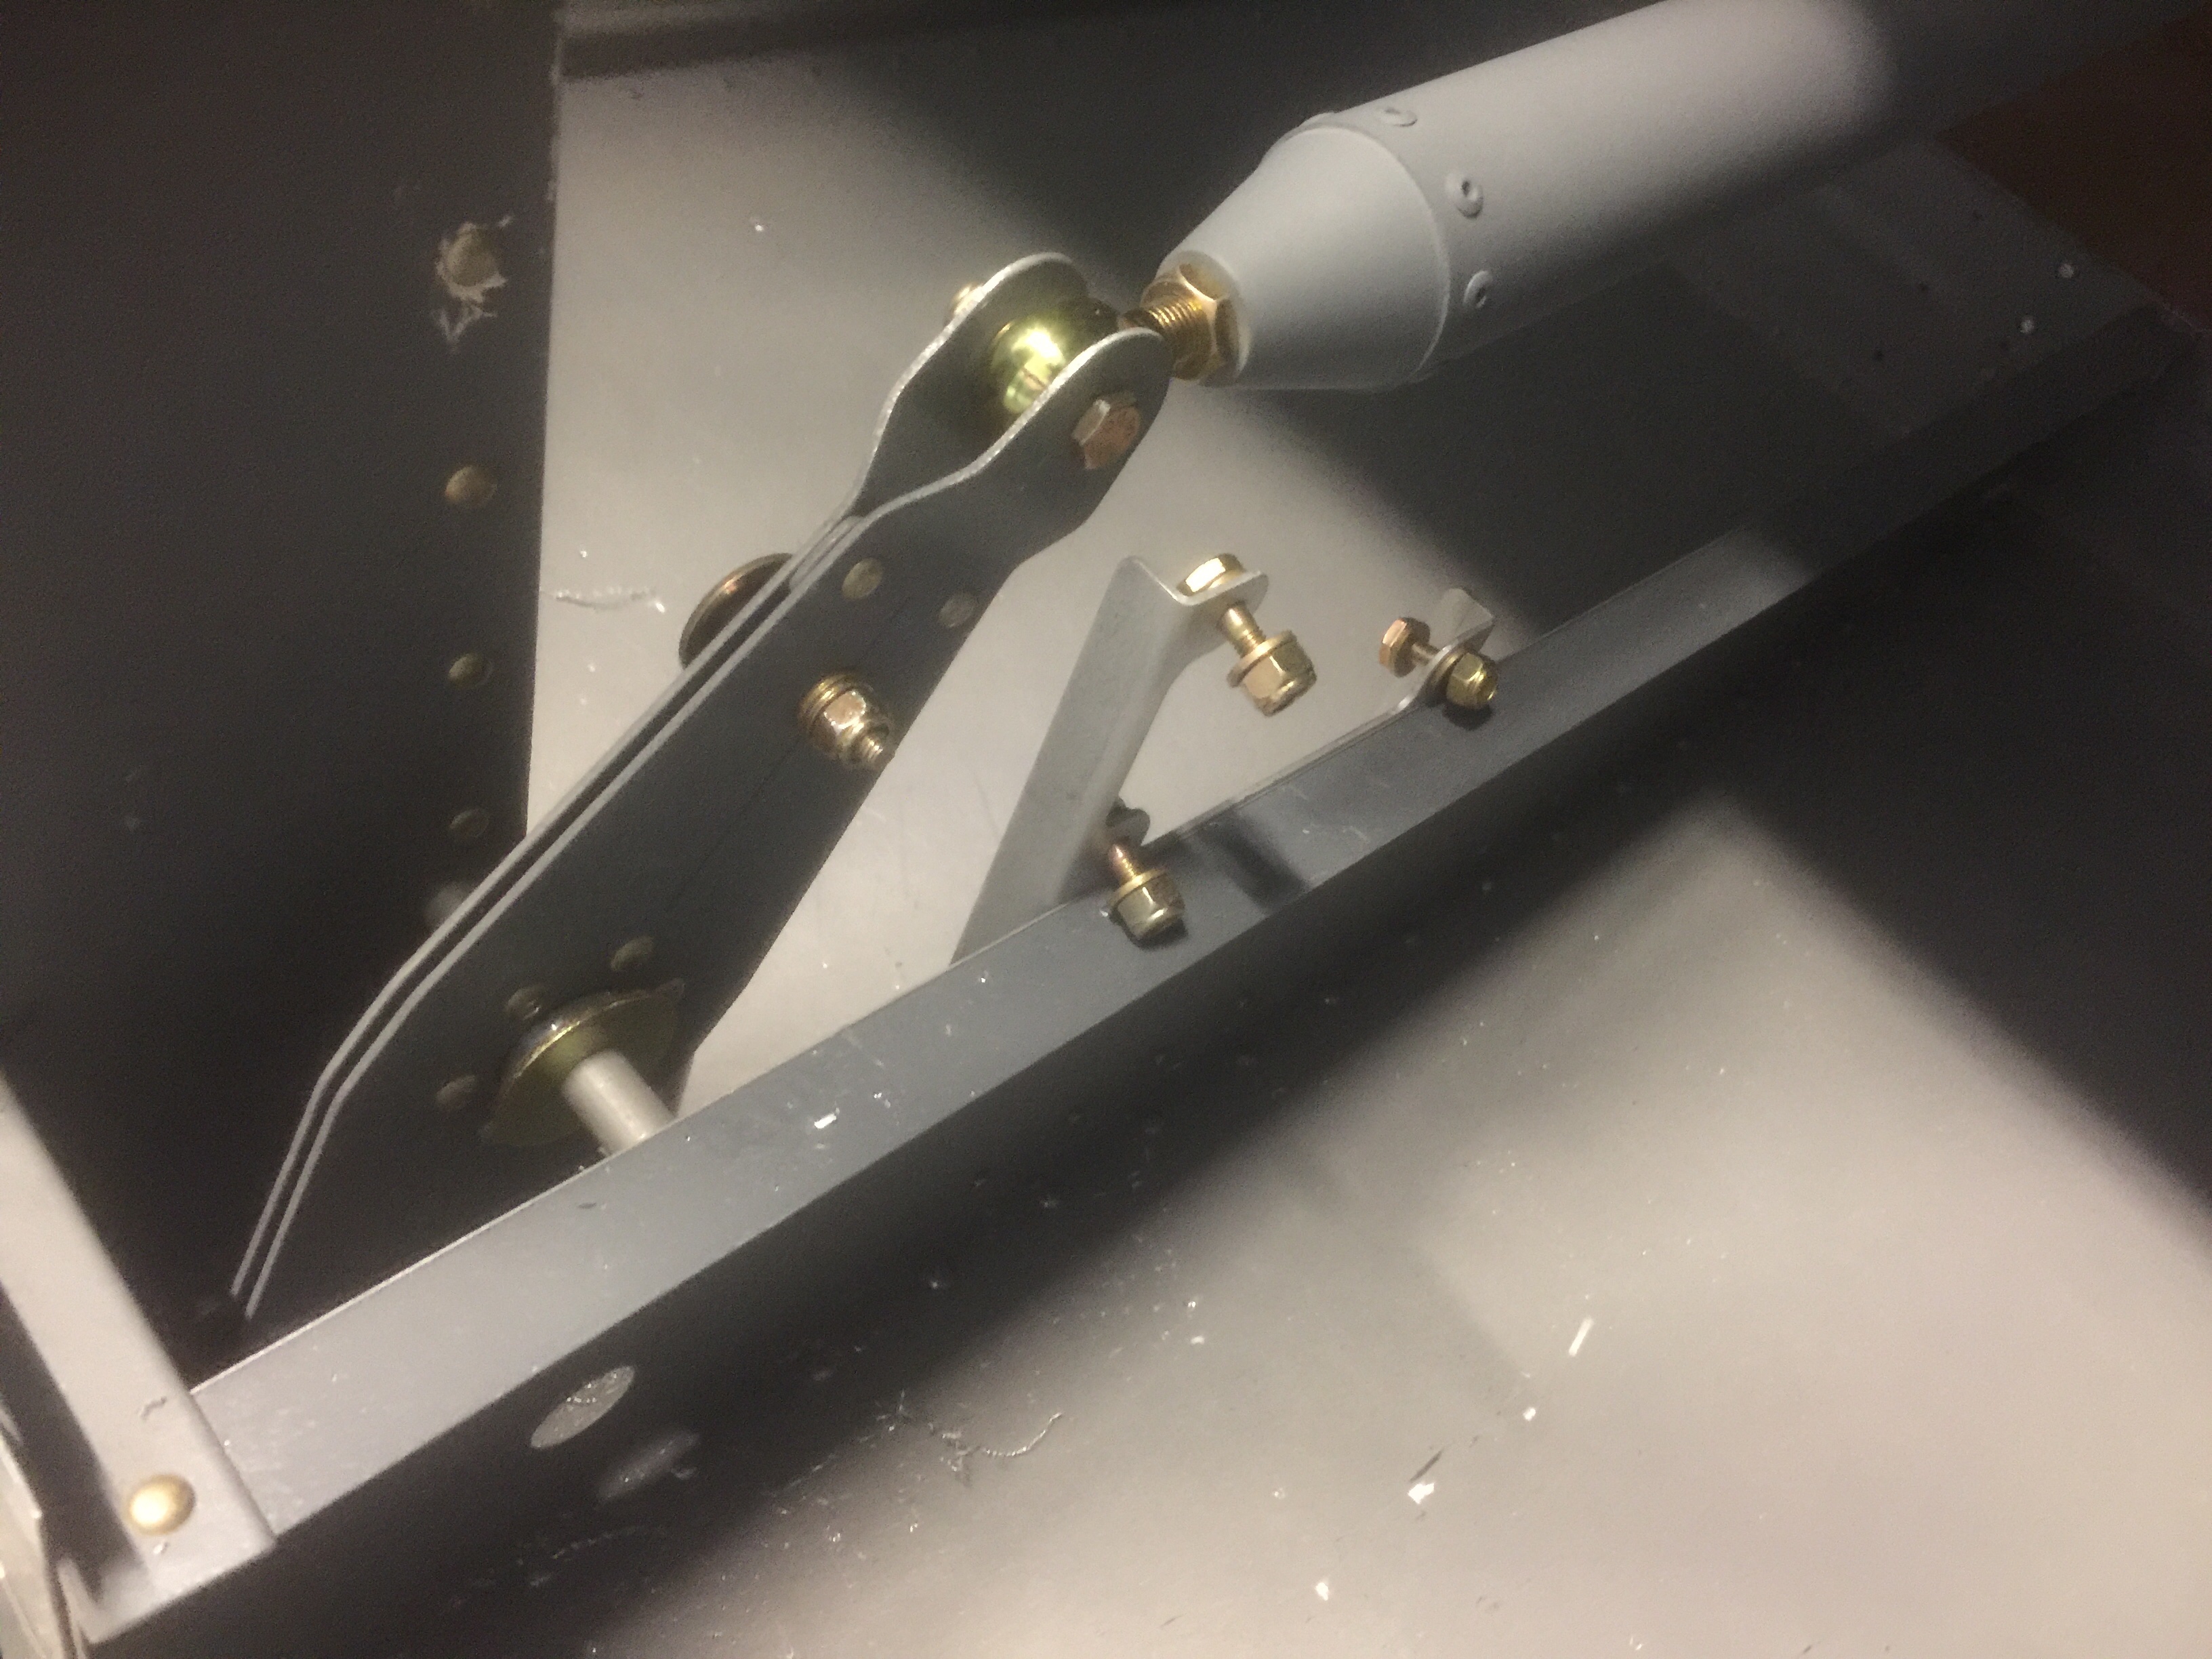
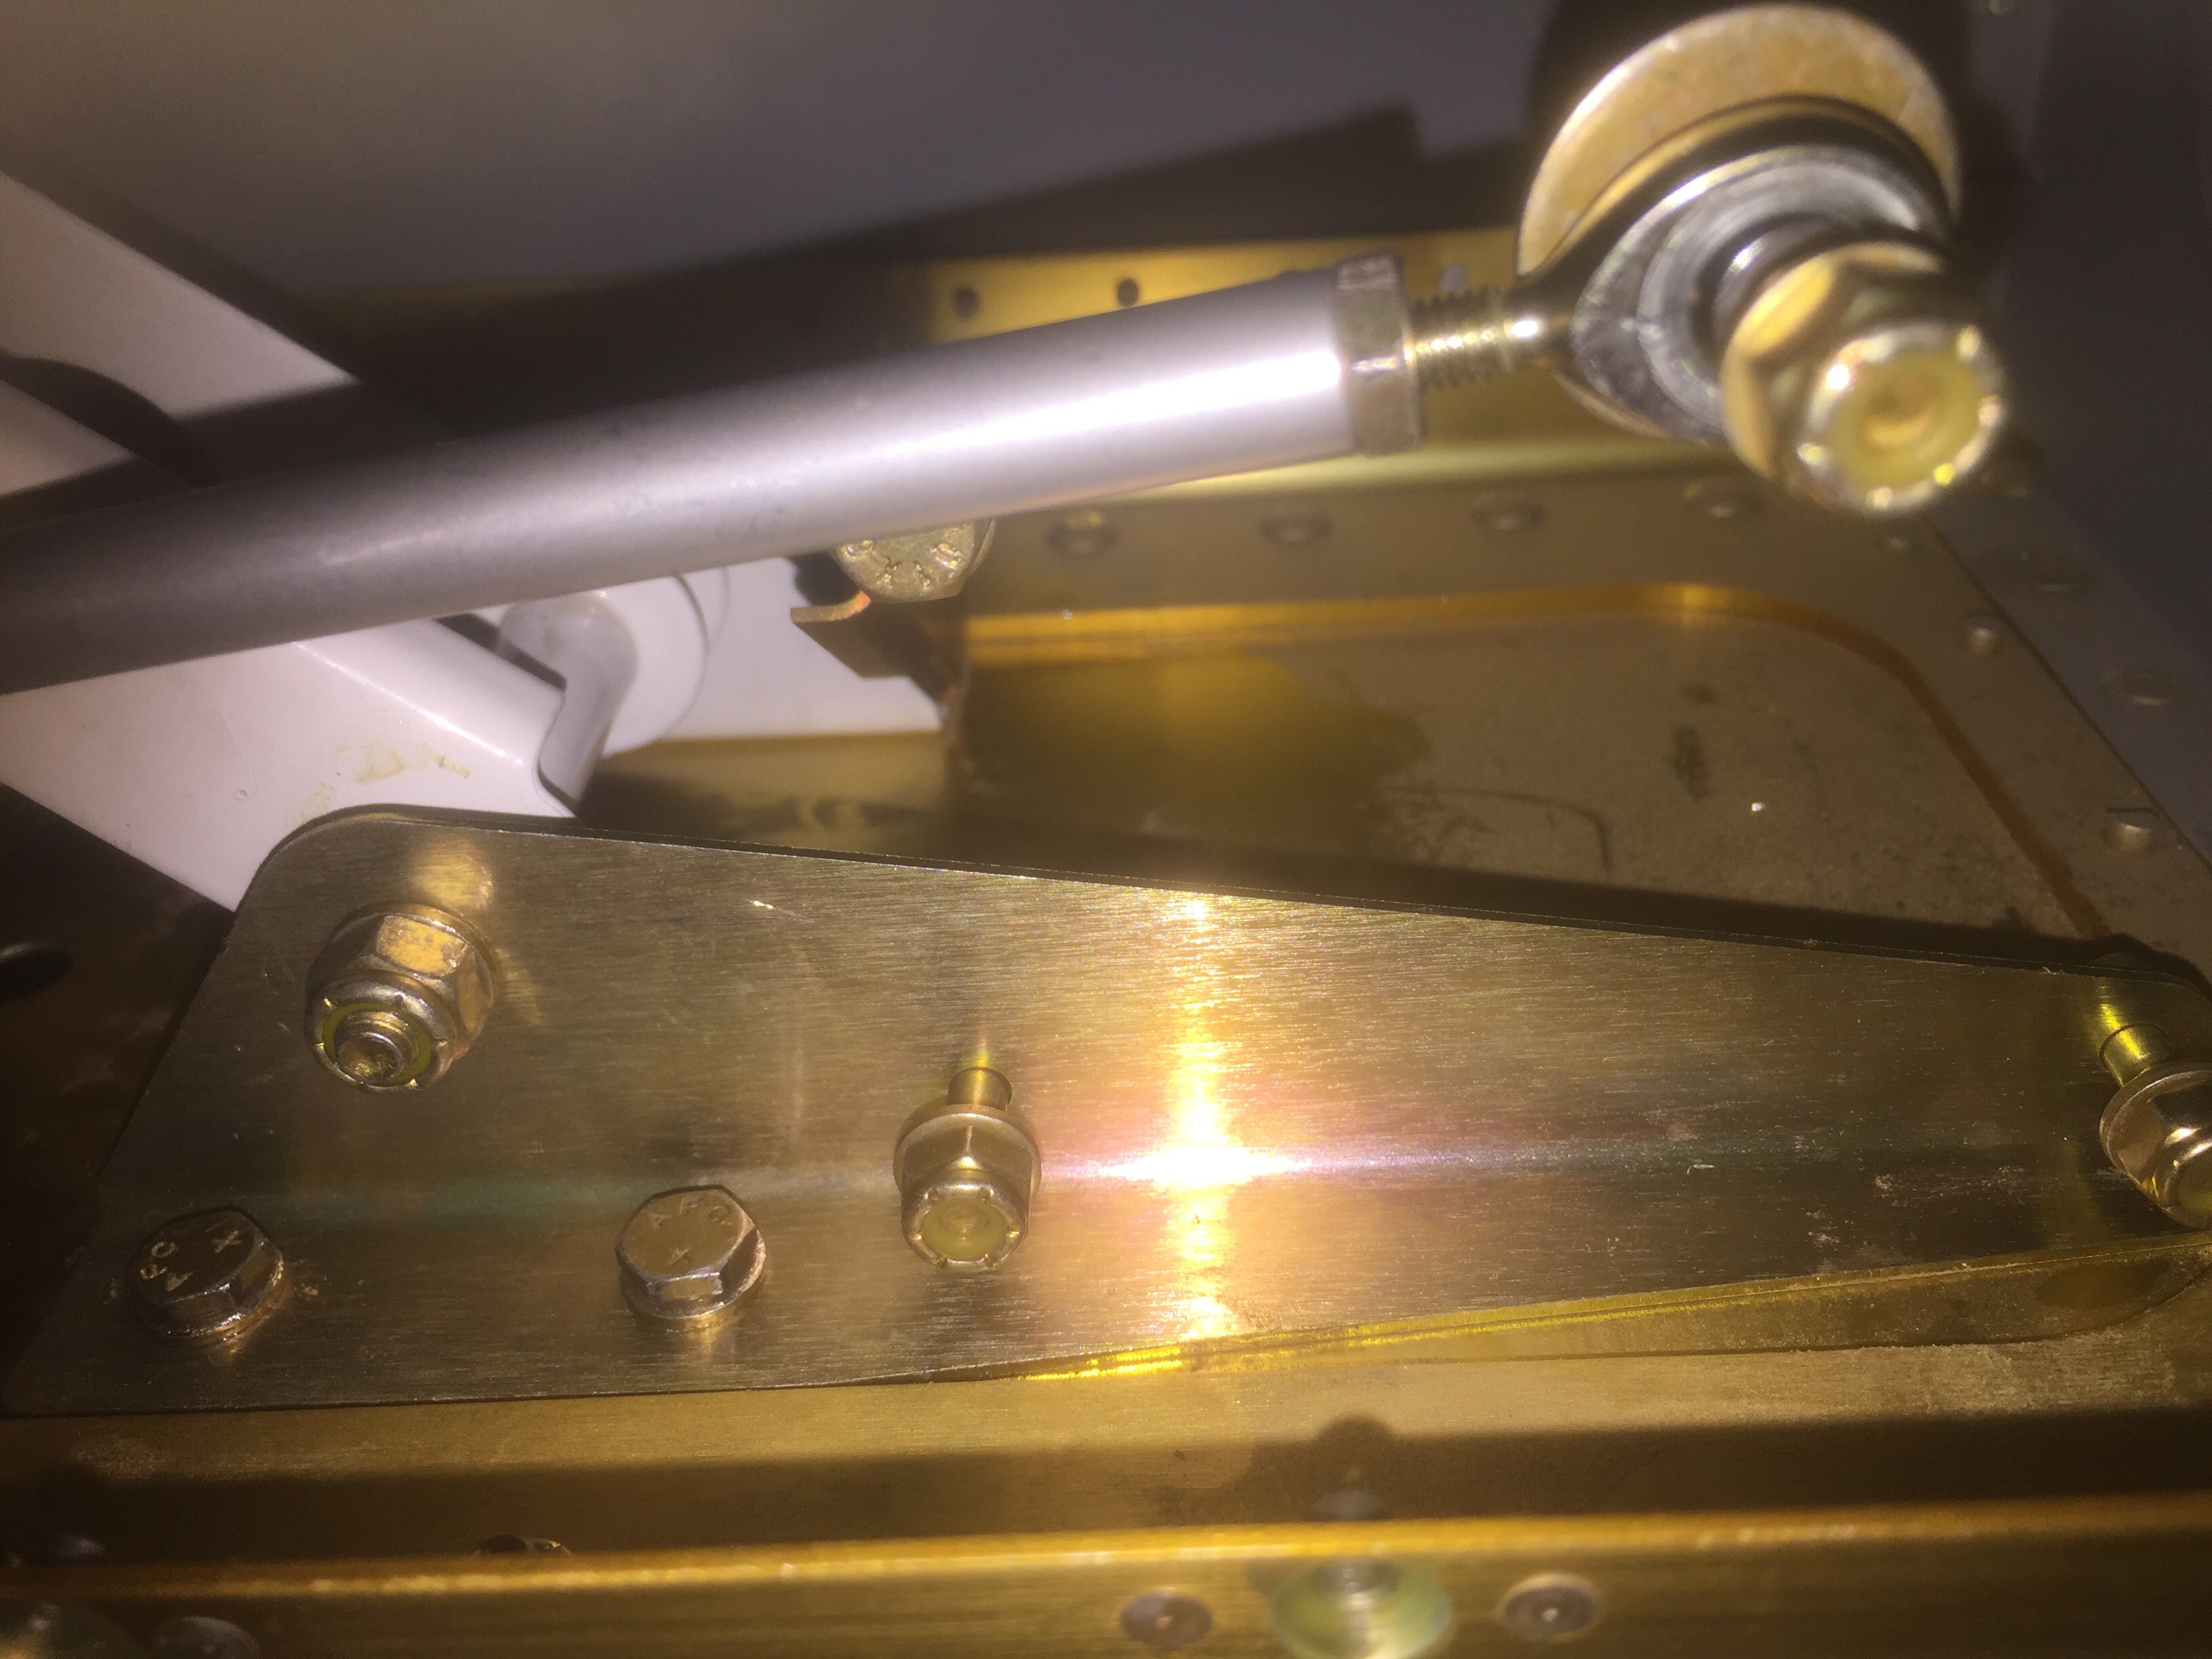
I installed the optional Electric Aileron Trim system.

This involved mounting the Servo, the bell crank and the springs which are attached to the aileron control rods.
Time: 10 hours.
I installed the mounts for the Autopilot Pitch Servo.
Time: 4 hours.
I deburred and dimpled all of the forward upper framework and skin.

Time: 3 hours.
I match drilled the cowling rivets and made the F721C and F721D brackets.
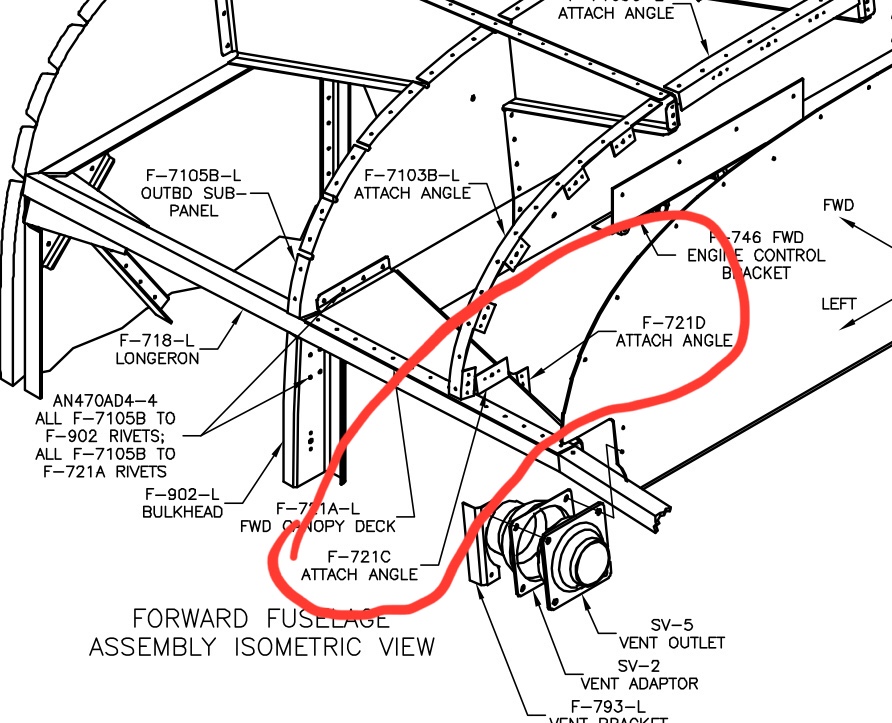
Time: 4 hours.
I fit and drilled the F-793-L&R Vent Brackets to the fuselage and the SV-2 Adapter and SV-5 Ventilator to the panel.

I also fitted and drilled the F-7106 Forward Top Skin to the forward fuselage.
Time: 5 hours.
