The flaps were the easiest control surfaces on the RV-7/7A to build. The only jigging required was a level, flat surface at least 5′ long and 1′ wide. Easy or not, it was possible to build in an unacceptable twist, so I had to work with care.
I prepared the flap spars by deburring the lightening holes and polishing the edges.
I drilled and clecoed the flap ribs to the spar and then clecoed the assembly to the bottom skin. I made the spacers that go between the end ribs and the bottom of the top skin. The aft edge of the ribs needed to contact the “rear spar” bent into the bottom skin. Thin shims between the aft end of rib and the rear spar were used to achieve this contact.
After making the shims, I drilled the ribs to the rear spar.
I then drilled the ribs to the bottom skin. The line of rivets along the bottom of the spar would hold the hinge that would connect the flap to the wing. I drilled and clecoed on the hinge as well. Pinning the two halves of hinge together while drilling helped to hold the hinge straight.
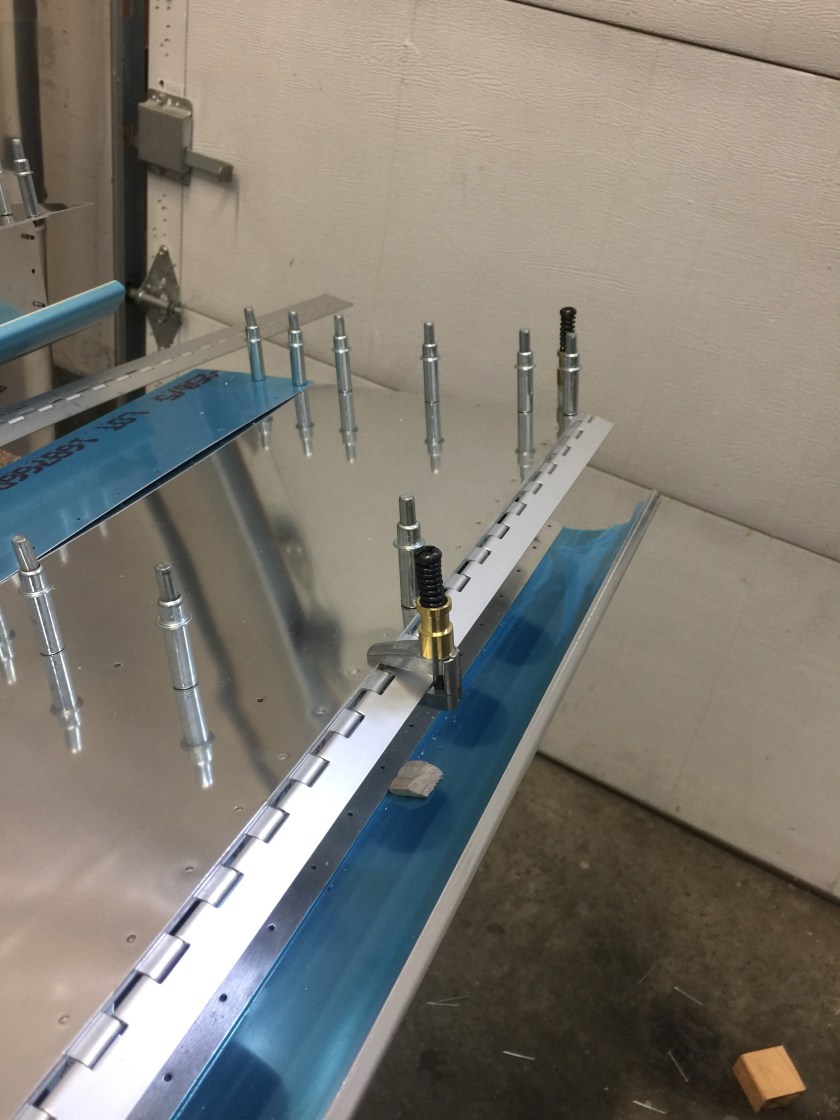
Instead of dimpling the bottom of the spar, I dimpled the skin and machine countersank the spar, with the hinge clecoed on to serve as a guide for the countersink pilot. The soft hinge did not have to be countersunk or dimpled.

I then fit the top skin to the assembly. I clecoed the top skin to the spar, aligned the holes along the ribs and drilled these before drilling the line along the bottom of the flap.
I fabricated the flap attachment angle. I then fit the flap attachment angle and flap attachment plate to the inboard rib and inboard end of the spar. I riveted the flap attachment angle to the spar with the AN rivets only, leaving the holes that would attach the rib open.
After the necessary dimpling, priming, etc., I began to rivet the flap together. A cradle, made with simple V-blocks like those used in the empennage, was a useful aid. I put the flap in the cradle and removed the spar to gain access to the rear row of rivets that joined the top and bottom skins. I riveted the interior ribs to the skins, but left the end ribs clecoed.

I riveted flap attachment plate and the platenut to the inboard flap rib, then riveted the rib to the skins…I had to set these rivets before “closing the door” by putting the spar in place.
When all the ribs were riveted to the skins, I riveted the spar to the ribs with blind rivets, then riveted the spanwise lines that join the spar and hinge to the skins. I finished by riveting the end ribs.
I expected to trim the upper skin of the flap slightly when the wing would be mated to the fuselage, but for now, I left it untouched.
Time: 6 hours.
