
Since I am using a float type fuel sender, I adjusted and checked it before I closed the tank. I made an electrical check with a multimeter which showed about 32 ohms when the sender was in the “full” position and about 240 ohms in the “empty” position. I installed the fuel pick-up tube and positioned it so it lay on the bottom of the tank. I used a small amount of sealant to seal the rivet holes. I then double checked all final details before installing the baffle and closing the tank. I checked that the tank vent line was in, and that its outlet was at the tank high-point. I checked the vent line bulkhead fitting to see that it was tight and that it had been installed with sealant. Once I was sure that everything was in order, I applied sealant to the tank skin from the rivet holes forward. Upon installation the baffle acted as a squeegee and the bead of sealant was pushed ahead as the baffle was moved forward. I used a maximum of 3/16′ bead of sealant. I put a bead of sealant along the inside edge of the flange on each end rib. I put a heavy glob of sealant where each corner of the baffle would meet the end ribs (this is one of the most common locations for leaks). I put a very thin smear of sealant around each of the rivet holes on the back flanges of the fuel tank ribs. I noticed that the tank ribs had a larger notch in the lower corner than in the top corner at the rear flange. This was to allow any water that might condense in the tank to run to the low point and be drained. I was careful not to allow the tank sealant to block off this path. With the tank sitting in the cradle, I installed the rear baffle assembly by dropping it straight down onto the rear flanges of the ribs. I put a cleco in every hole of the fuel tank skin to baffle joint. After clecoing, I inspected the skin to see if it was pillowed out between the clecoes. The contact surface of the tank baffle flange required pressure to force out the excess sealant. The easiest way was to apply cleco clamp between each set of rivets and squeeze out the excess. I twirled the closed end blind rivets in sealant and set them in the top and bottom baffle-to-rear rib-flange holes. The fuel tank attach brackets were installed last. I checked to be sure that the platenuts had been installed on them because it would have been much more difficult to do it once they had been riveted to the tank. I put a very light smear of sealant over each hole for mounting the fuel tank attach brackets. I noted that the brackets on each end of the tank used solid rivets, not blind rivets. While double-checking with the drawings, I clecoed each bracket in place. I was careful to get them oriented correctly because they would have been shortly very difficult to change. I installed the blind rivets in the fuel tank attach brackets after twirling them in sealant. I finished all of the riveting and cleaned the excess sealant off the tank.
To mount the cover plate I used an 1/8” inch thick bead of fuel tank sealant between the cover plate and the inboard rib. I dabbed a small blob of sealant on threads of each attach screw, insert them into the holes, and tightened them sequentially until the sealant bulged evenly about 1/32” from underneath the perimeter of the sender plate. The sealant also formed a small gasket around each screw head.

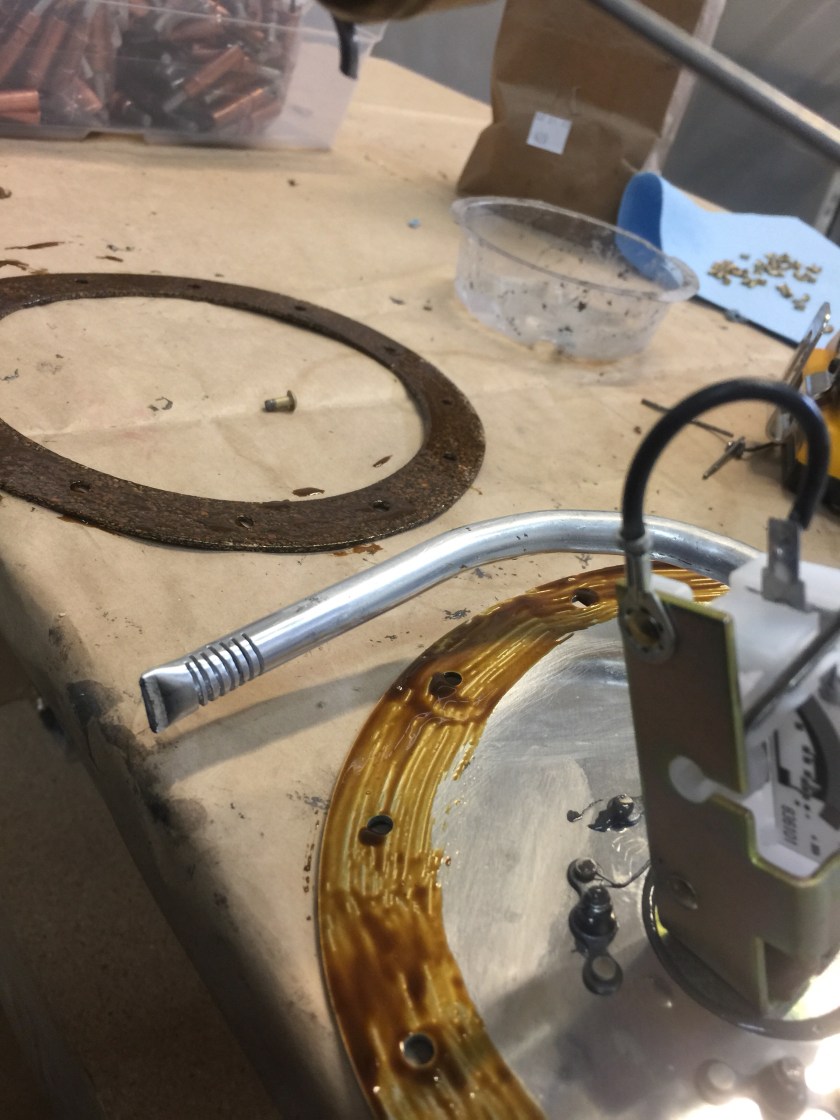
I installed the Fuel Level Sending Units with sealant using the appropriate hardware. I did not install the rubber gasket supplied by the manufacturer. I used the same procedure for sealing the sending unit as was accomplished above. A continuous electrical path was necessary between the airframe and the sender plate so I made sure that at least one of the screw heads was making metal to metal contact with the outside of the sender plate. I conducted a final electrical continuity test for the sender units with an Ohm Meter by probing the tank body and the sender center screw to ensure proper operation. I waited 48 hours and then conducted a fuel tank leak check using the FUEL TANK TEST KIT obtained from Vans Aircraft.
Time: 16 hours.
